What You Need to Know about Fairy Embroidery Designs
Fairy embroidery designs are some of the most popular and widely used designs in the world of embroidery. There is something about their whimsy and charm that just speaks to people, regardless of age. Whether you are looking for a design to stitch onto a baby blanket or a design to add some pizzazz with this free tooth fairy pillow embroidery pattern we will be providing, there is a fairy embroidery design out there for you. In this blog post, we will look at some of the most popular fairy embroidery designs, as well as where you can find them. We will also be providing a free fairy machine embroidery design to the reader. So, if you are ready to add some magic to your next embroidery project, read on!
There are a few things to consider when choosing fairy embroidery designs. First, think about the overall look you want to achieve. Do you want something delicate and ethereal, or something bold and colorful? Second, consider the size of the design. Some embroidery fairies are quite small, while other embroidery fairies can be quite large. Third, think about the level of detail you want in the design. Some fairy embroidery designs are quite simple, while others are quite intricate.
Check out these cool fairy embroidery scissors
How to Choose the Perfect Fairy Embroidery Design
Fairy embroidery designs are the perfect way to add a touch of magic to any project. Whether you’re looking for a design to stitch onto a baby blanket or a throw pillow, there are many ways to find the perfect design for your needs.
The first place to start your search is online. There are many websites that offer free embroidery designs, and many of them will have a section devoted to fairies. You can also find sites that sell embroidery designs, and these will often have a wide selection of fairy designs to choose from.
Another great place to look for fairy embroidery designs is in magazines. Many craft stores sell magazines that feature different embroidery designs, and some of them will have a section devoted to fairies. You can also check your local library for magazines that feature embroidery designs.
Once you’ve found a few possible sources for your fairy embroidery design, it’s time to start narrowing down your choices. The first thing you’ll want to do is decide what type of design you want. Do you want a simple design that you can stitch onto a baby blanket, or do you want something more elaborate?
If you’re looking for something simple, then you might want to consider using one of the free designs that are available online. These designs are usually very basic, and they won’t take up much space on your project. However, if you’re looking for something more elaborate, then you’ll need to purchase an embroidery design from a website or magazine.
When you’re ready to purchase an embroidery design, make sure that you read the instructions carefully before beginning your project. This way, you’ll know exactly what materials and supplies you’ll need, and you won’t run into any problems along the way.
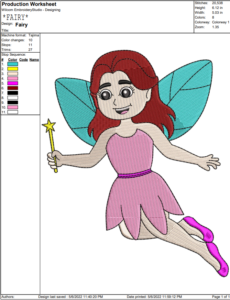
Our free Fairy Embroidery Designs
Do you want to make a special pillow for the tooth fairy? Check out this free embroidery pattern and design!
This adorable tooth fairy pillow is sure to please any child who loses a tooth. The embroidery design is simple and easy to follow, and the finished product is sure to bring a smile to the face of any little one.
If you’re looking for a unique and special gift for a child in your life, this tooth fairy pillow is a perfect choice. It’s sure to become a cherished keepsake that will be treasured for years to come.
There are a few things to keep in mind when downloading our free embroidery designs. First, be sure to check the file format. Most machines use either .pes or .dst files. If you’re not sure which format your machine uses, check the manual or do a quick Google search. In the downloadable zip file there is both the .PES and .DST files.
Click here or on the image below to download the free Fairy Embroidery Designs in .PES and .DST Files.
 PDF File
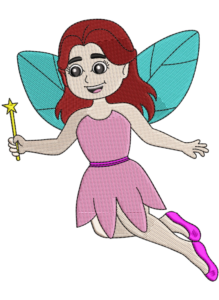 .PES and .DST Files
Step-by-step guide on how to embroider a Fairy Design on a machine:
- Choose your tooth fairy embroidery design. This can be done by finding a design online or drawing one yourself.
- Once you have your design, transfer it onto the fabric you will be using. This can be done by tracing the design onto the fabric with a water-soluble pen or by using transferable pencils or markers.
- Cut out your machine embroidery tooth fairy pillow pattern, leaving approximately 1/4” of fabric around the outside of the design.
- Place the cut-out design onto the stabilizer. The stabilizer will help to keep the fabric from stretching as you stitch and will also add stability to your design.
- Hoop the stabilizer and fabric together. Be sure that the fabric is tight in the hoop and that there are no wrinkles or creases in the fabric.
- Thread your machine with thread that matches your fabric and design.
- Begin stitching your design, starting at the center and working your way out.
- Once you have finished stitching, remove the hoop from your machine and trim away any excess stabilizer from around the outside of the design.
- Cut a piece of backing fabric that is slightly larger than your design and place it behind the embroidered piece.
- Use a zigzag stitch or blanket stitch to secure the two pieces of fabric together around the outside edge of the design.
Step-by-step guide on how to embroider a Fairy Design by hand:
- Choose your fabric. Aida cloth is a good choice for beginners because the holes are easy to see and count. You can also use linen or even recycled denim.
- Cut your fabric to the size you want your finished piece to be, plus an extra 2-3 inches on all sides for framing or mounting later.
- Find the center of your fabric by folding it in half both ways and marking the intersections with a pencil or water-soluble pen. This will be where you start stitching your design.
- Decide on your embroidery fairies designs or design. You can freehand a design, trace one from a coloring book or print one out from the internet. If you’re using a printed design, transfer it to your fabric by tracing it with a light box or holding it up to a windowpane and tracing it with a pencil.
- Thread your needle and knot the end. Start stitching in the center of your design and work your way outwards. When you get to the edge of a line, take a small backstitch to secure the thread before moving on to the next line.
- To change colors, knot your thread off at the end of the section you’re working on and start again with the new color. You can also carry multiple colors of thread along the back of your work, but this can make your stitches less secure.
- When you’re finished stitching, knot off your thread and trim it close to the fabric. Congratulate yourself on a job well done!
How to Incorporate Fairy Embroidery Designs into Your Home Décor
Fairy embroidery designs are a great way to add a touch of whimsy and magic to your home décor. Whether you stitch them onto pillows, curtains, or even clothing, these enchanting designs are sure to bring a smile to your face. Here are a few tips on how to incorporate fairy embroidery into your home décor:
- Choosing embroidery fairy designs that speak to you is everything. There are literally thousands of different fairy embroidery designs out there, so it’s important to choose one that really speaks to you. Maybe you’re drawn to a particular fairy tale, or maybe you just love the look of delicate wings. Whatever your preference, make sure the design you choose is one that you’ll be happy looking at every day.
- Consider the colors. Fairy embroidery designs often incorporate a wide range of colors, so think about what hues will work best with your existing décor. If your home is full of earth tones, for example, you might want to choose a design with lots of greens and blues. On the other hand, if your style is more modern, you might prefer a design with brighter colors.
- Think about the size. Fairy embroidery designs come in all different sizes, so it’s important to consider how big (or small) you want your finished project to be. If you’re planning on stitching a design onto a pillow, for example, you’ll need to make sure the design is small enough to fit within the confines of the fabric. On the other hand, if you’re looking to add a bit of flair to a plain piece of clothing, you might want to choose a larger design.
- Decide on the stitches. There are many different types of stitches used in embroidery, so it’s important to choose ones that will work well with the fabric and thread you’re using. If you’re not sure which stitches to use, consult a book or online resource on basic embroidery techniques.
- Gather your supplies. Once you’ve chosen your design, it’s time to gather the supplies you’ll need to bring it to life. In addition to thread and fabric, you’ll also need an embroidery hoop (to help keep your fabric taut while you stitch), scissors, and a needle. If you’re new to embroidery, it might be helpful to purchase an embroidery kit, which will contain all the supplies you need to get started.
- Trace your design onto the fabric. Once you have all your supplies gathered, it’s time to start stitching! Begin by tracing your chosen design onto the fabric using a water-soluble pen or pencil; this will help ensure that your stitches stay within the lines of the design. If you make a mistake while tracing, simply wet the area with a damp cloth and start over again.
- Start stitching! Now comes the fun part: actually, stitching your design onto the fabric! Start by threading your needle with embroidery floss (make sure to knot the end) and then begin working your chosen stitches according to the pattern traced onto the fabric. If at any point you need to take a break from stitching, simply knot off your thread and pick up where you left off when you’re ready to start again.
- Finish up! Once you’ve completed your stitching, cut off any excess thread and gently remove the hoop from around the fabric. Congrats—you did it!
Hello and goodbye! Thank you so much for visiting Hello We Sew. We hope you had a great time browsing our website and found everything you were looking for. If not, please feel free to contact us and let us know how we can improve. We love hearing from our visitors and are always looking for ways to improve our website. So, thank you again for stopping by and we hope to see you soon!
If you forgot to download our free fairy applique embroidery design here is your chance again.
Hey also do not forget to check out The Best Embroidery Software for Mac Computers and iPads (2020).